In the first installment of this course, you learned six chords and played through some progressions to get you comfortable with moving around the small real estate
that is the mandolin neck. Don't worry if you're still figuring things out. The instrument is new to you, and you to it. Give yourself time. You won't get this
over night. It won't be comfortable right away. Just be patient with yourself and you'll do fine!
This lesson involves more chords and progressions, similar to what you already know, but with some slight differences. Perhaps you played around with some ideas
already. That's great. Experimenting and figuring things out on your own is encouraged as a companion activity to actual learning.
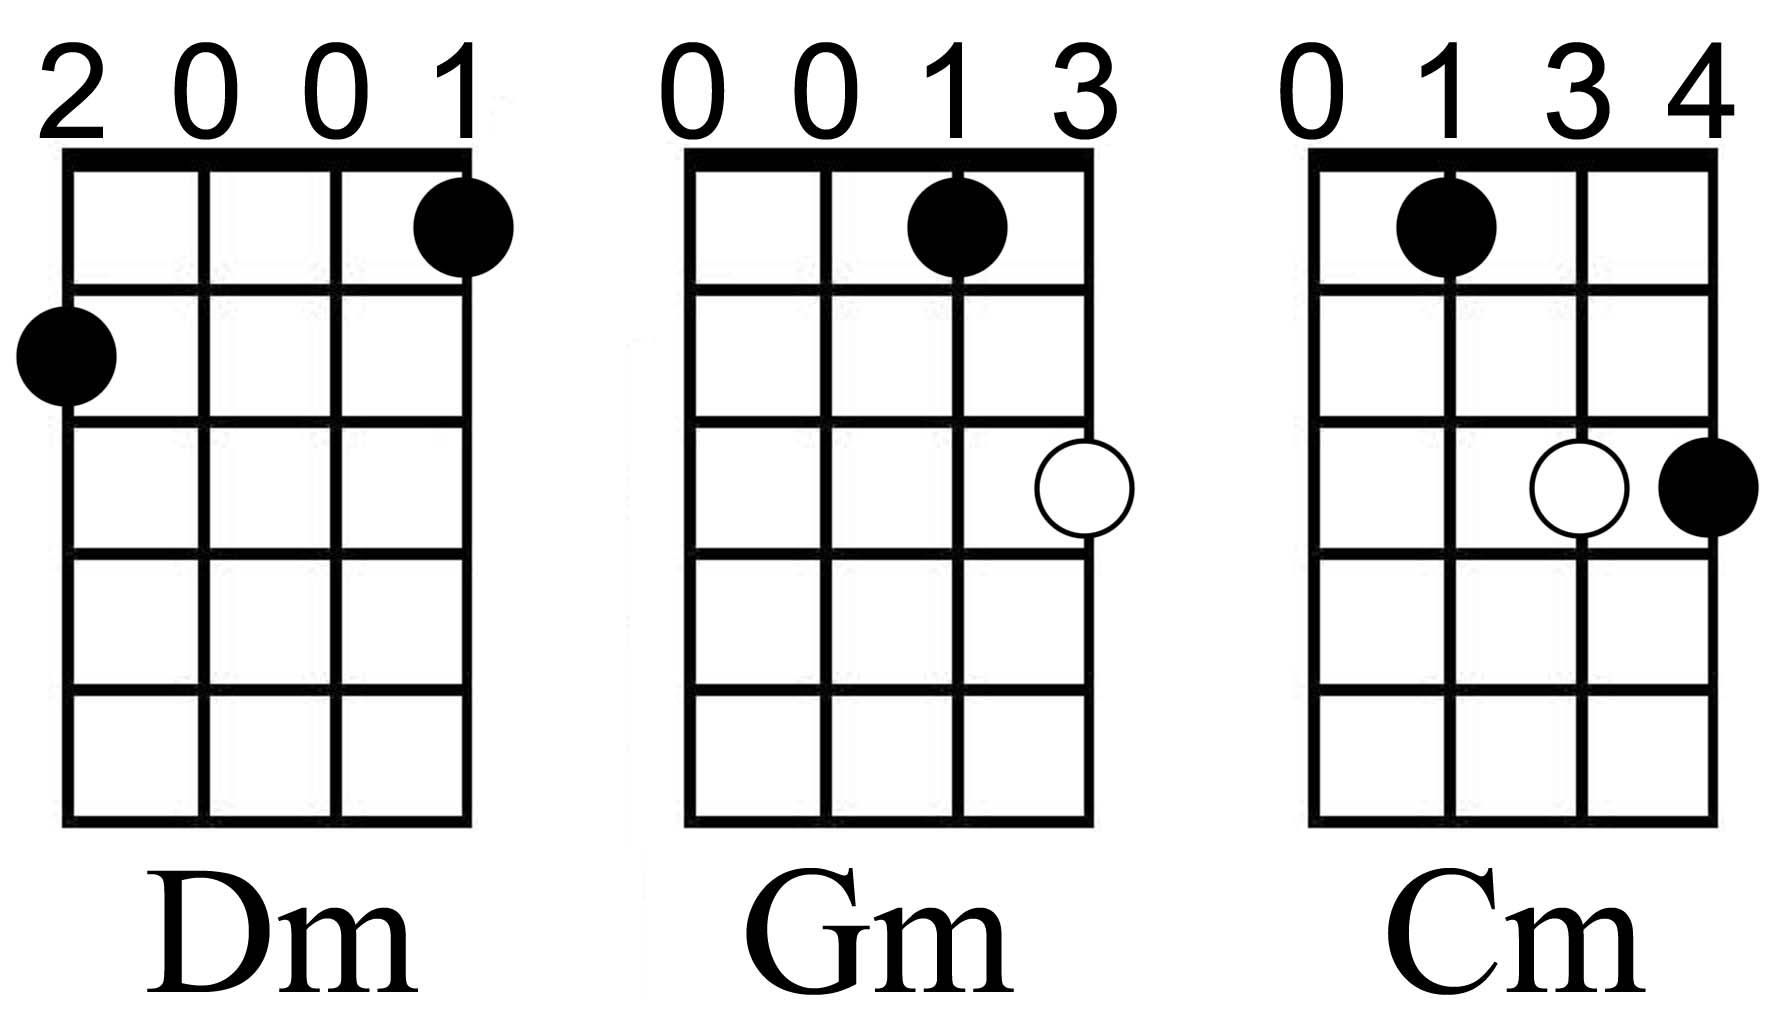
The first new chords we'll now introduce are minor chords. Minor chords, for those who don't know, are "sad" chords; they tend to sound less happy than major chords.
So songs about loss and heartache tend to use minor chords to emphasize and re enforce the feeling of how tragic the topic is. Here are Dm, Gm and
Cm. Again, the open circles are the root tone of the chord. The Dm root is the open 3rd string.
Remember, too, the indicated fingerings are what I use. Adjust your fingering if necessary to get the best sound. Just make it a common sense fingering and you'll be fine. Remember, you have to be able to move to and from a chord easily (most of the time).
Okay, now let's put these to work in a couple of progressions, blending chords you've already learned with the new chords.

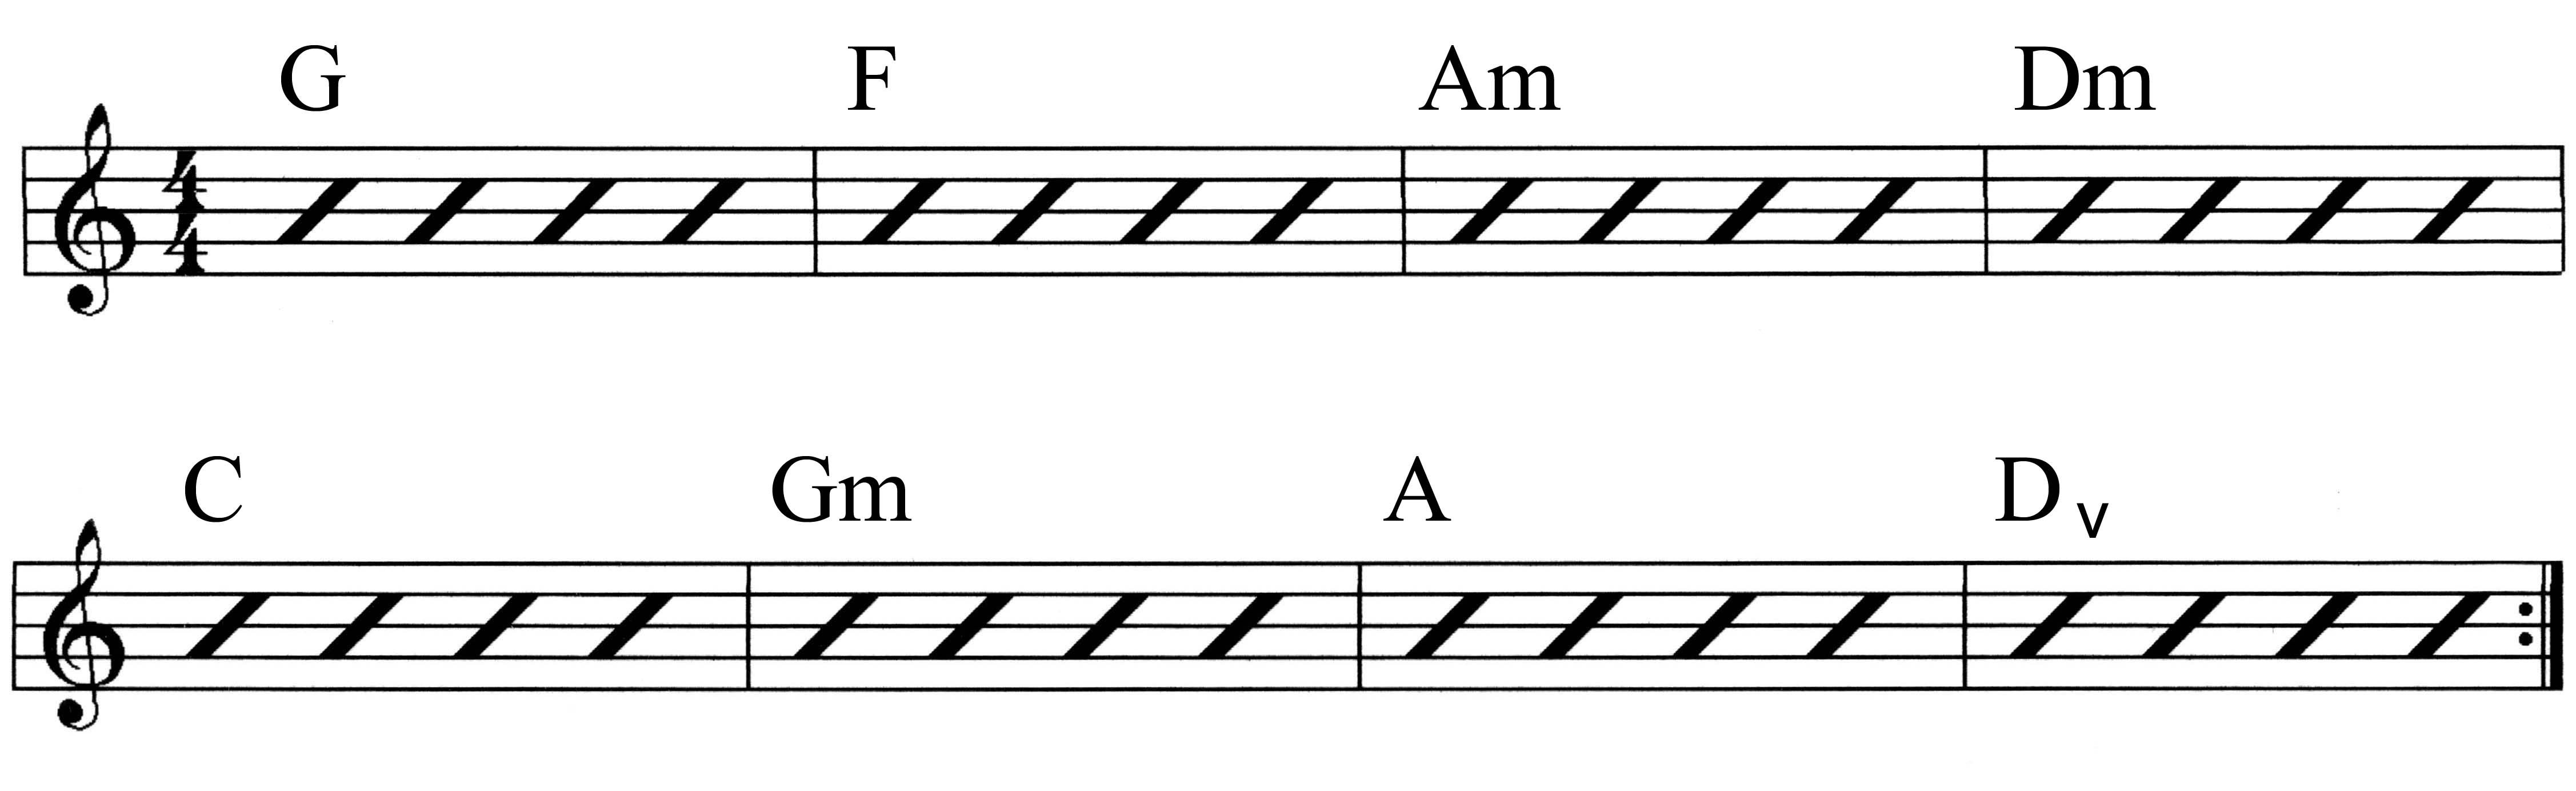
And now a second, slightly longer progression. Pay attention to bars 5, 6 and 7: two chords per bar there, which means just two beats (strums) per chord. This will
get you moving between chords a little more often and in a way that is much like you'll find in actual songs
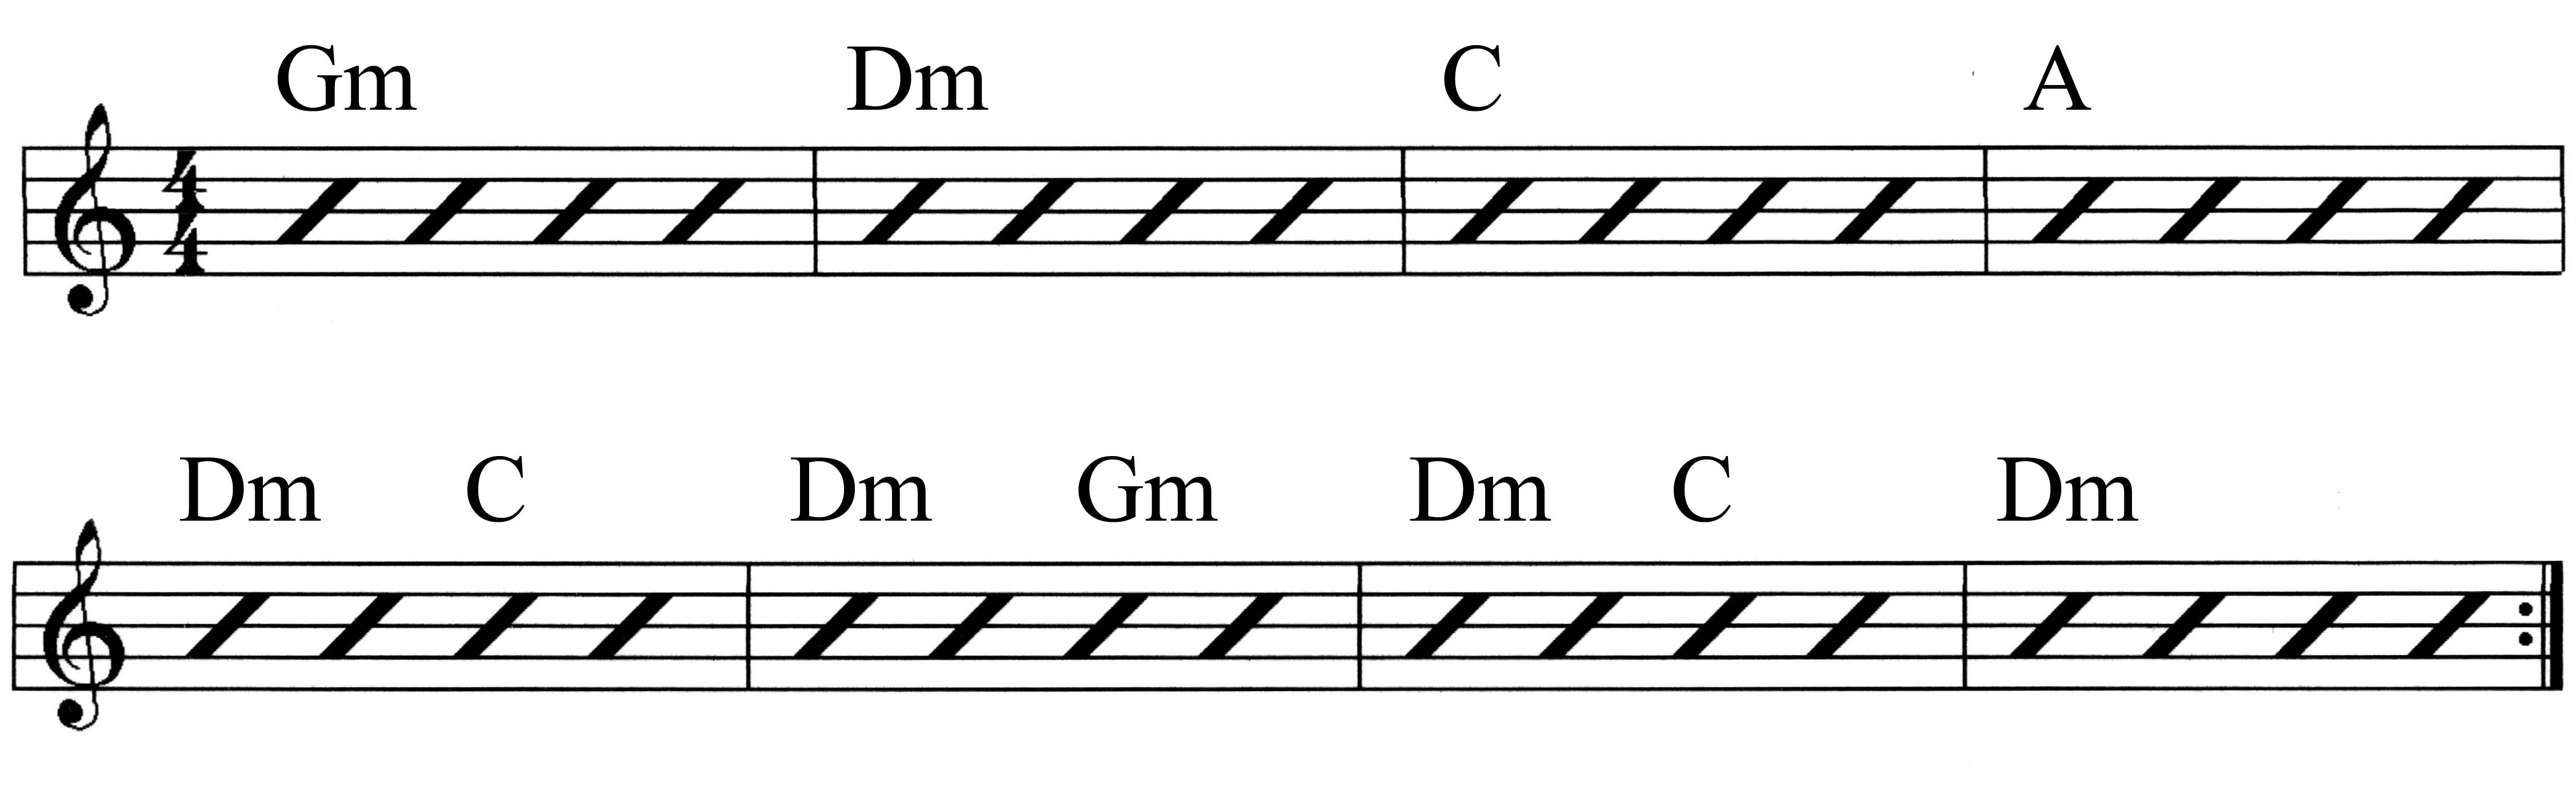
Don't forget about the metronome here! Once you are comfortable with the new chords, begin to play with the metronome at a comfortable tempo you can actually handle, say around 60 bpm (beats per minute). If that's still too fast, slow it down.
Let's introduce a few more chords now. These will be a mix of types. And remember, any chord that has no open strings can be moved around.
Below you will find an Am, an Em, and an F chord. For the Em chord, the root is the high E string.
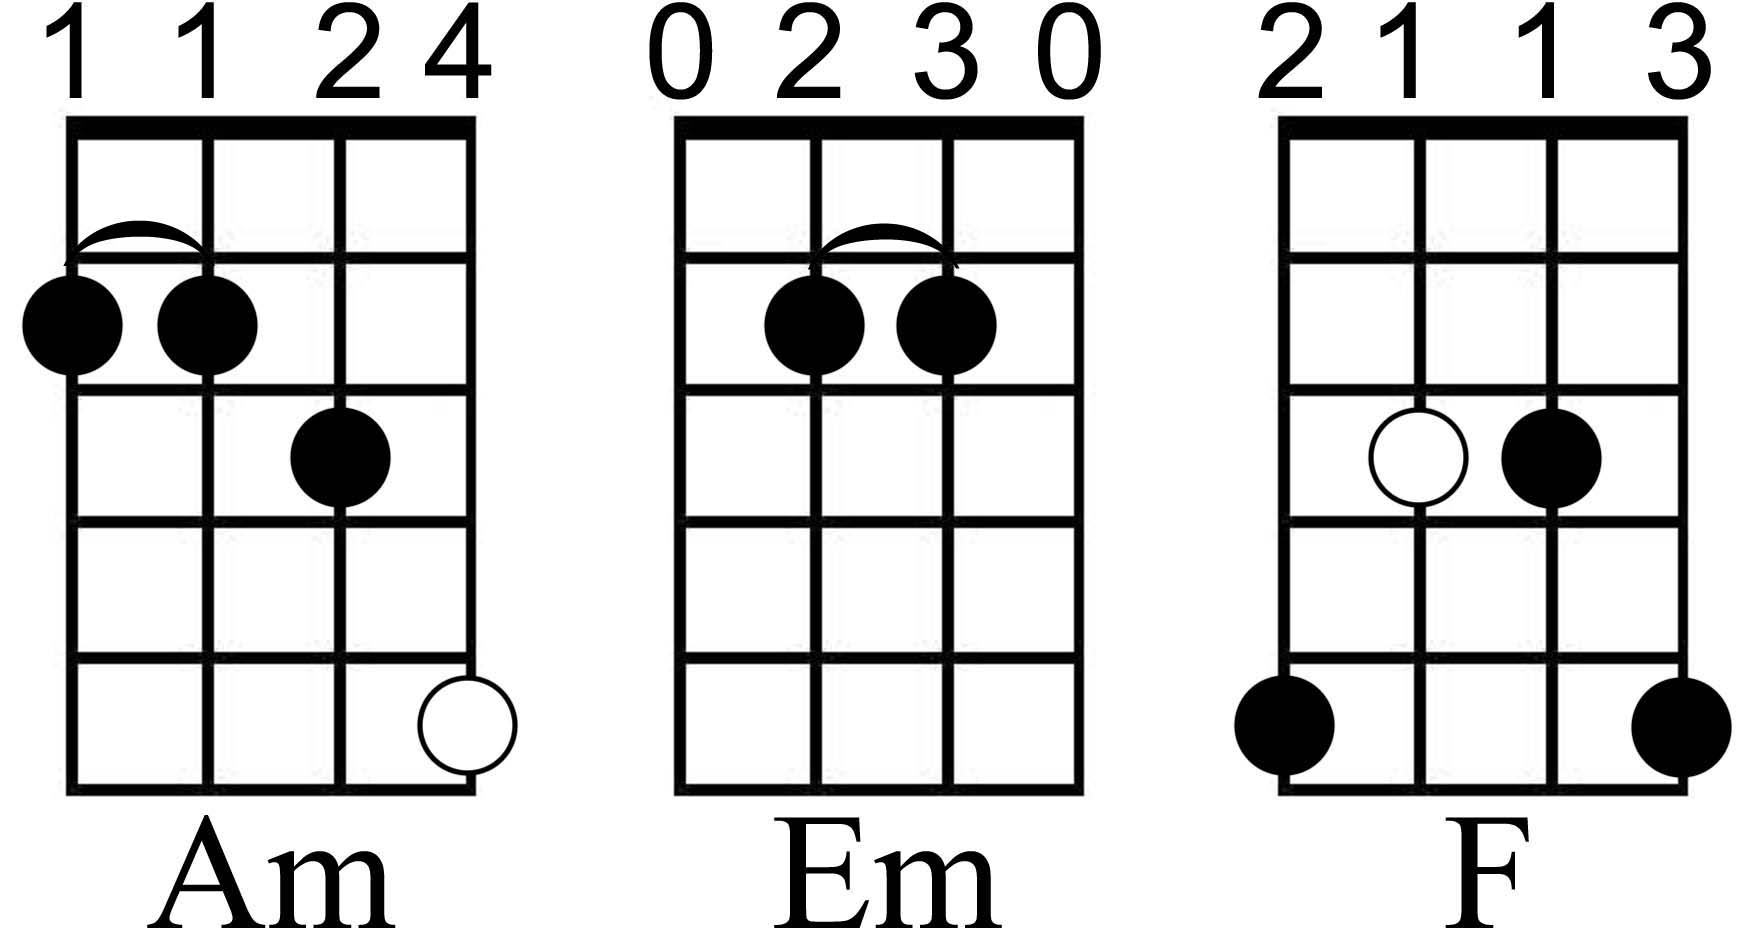
Remember, the Am and F are movable chords. Take note of the root and wherever you move it, the chord takes on that "identity", key tone wise.
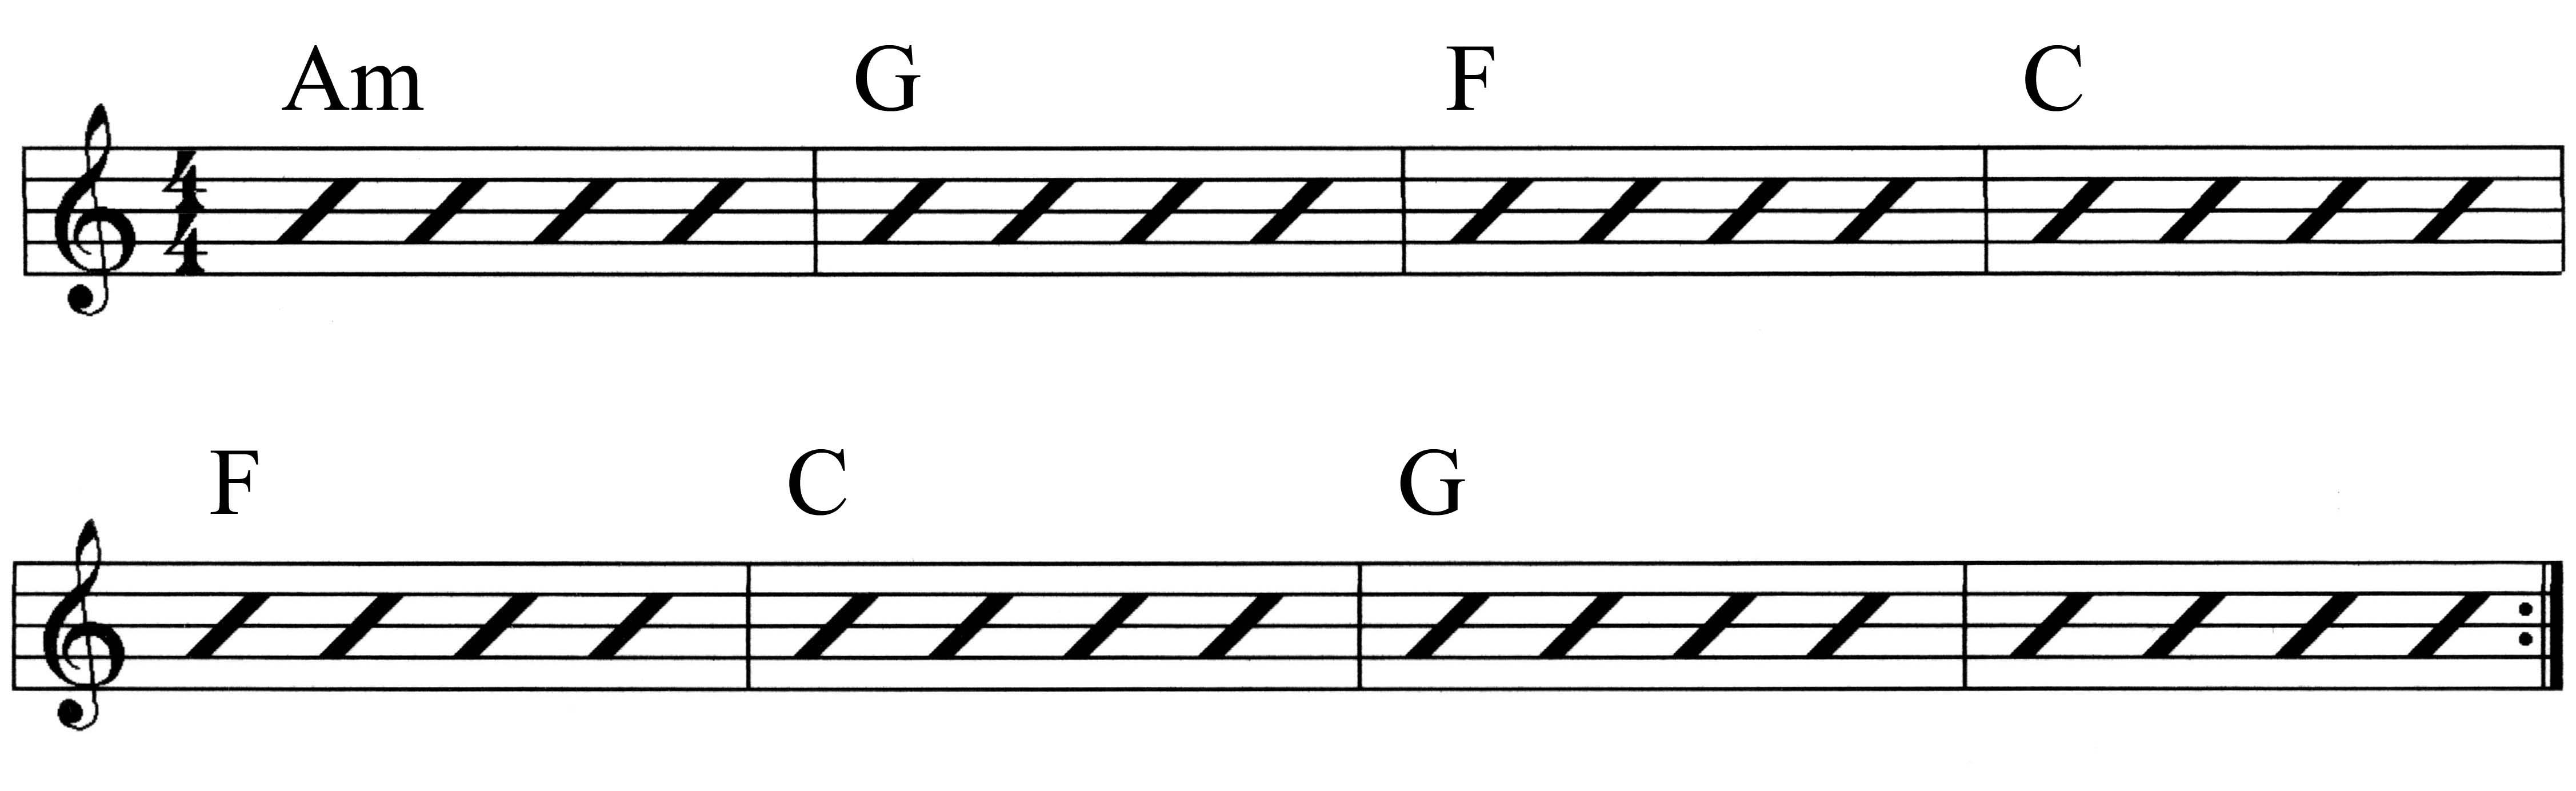
Now let's play some more progressions using these and previous chords. Take your time and get comfortable with the changes. Find ways to simplify the transitions by
looking at any possible "connections" you might find between one chord and the next one. Can you slide a finger up, does one finger simply need to move over one
string? Stuff like this will help you get quicker at the changes you encounter.
For this next progression we're going to introduce the idea of moving a chord form around. A Roman numeral "subscript" will indicate which version of a given chord
you should use; this is standard practice for fretted instruments. For example, in this next progression you will be playing a D chord at the fifth fret
instead of in the open position. There will be a littl "v" next to the chord to indicate the fret position. You simply move the known form, the E you learned before,
until the root is in the right place, in this instance, at the fifth fret. Give it a go and see how you do.
Lots of chords can be moved around. So look at all the movable chords you've learned thus far and create your own progressions giving this idea a further workout. You will need to be able to play any given chord anywhere it can be moved. Of course, first position chords would have to be modified to be movable, but that's another lesson!
Until the next lesson, simply toss about some ideas, experiment and remember to have fun.
Now, start makin' some foot stompin' music!