
Okay, so you're playing some pretty good rhythms and some really good solos, having been playing for a while now. Things are beginning to come into focus and you are
beginning to sound like you know what you're doing. You can contribute at jam sessions and even play through some of your favourite songs from beginning to end.
But, and this is what really frustrates you, there are a few things that just don't seem to be coming together yet, no matter how hard you try. Well, in truth, this
is not unusual. Some things just don't get taught well - if at all - and other things just take a lot more time than we want. And when you are stumbling over them
again and again, you have to find solutions.
My students confront this kind of stuff all the time. Some people come to me for lessons precisely because of this issue. And I make sure they learn the tools they
need to be able to solve any problem they come up against. But, and this is important, even with possessing the tools, some problems take more time than others to
overcome. Sometimes, it isn't really a problem, but rather a matter of progress and/or technique not being mature enough. It is important to know the difference
because it can curtail a lot of frustration or blaming a teacher when it isn't about blame, but growth!
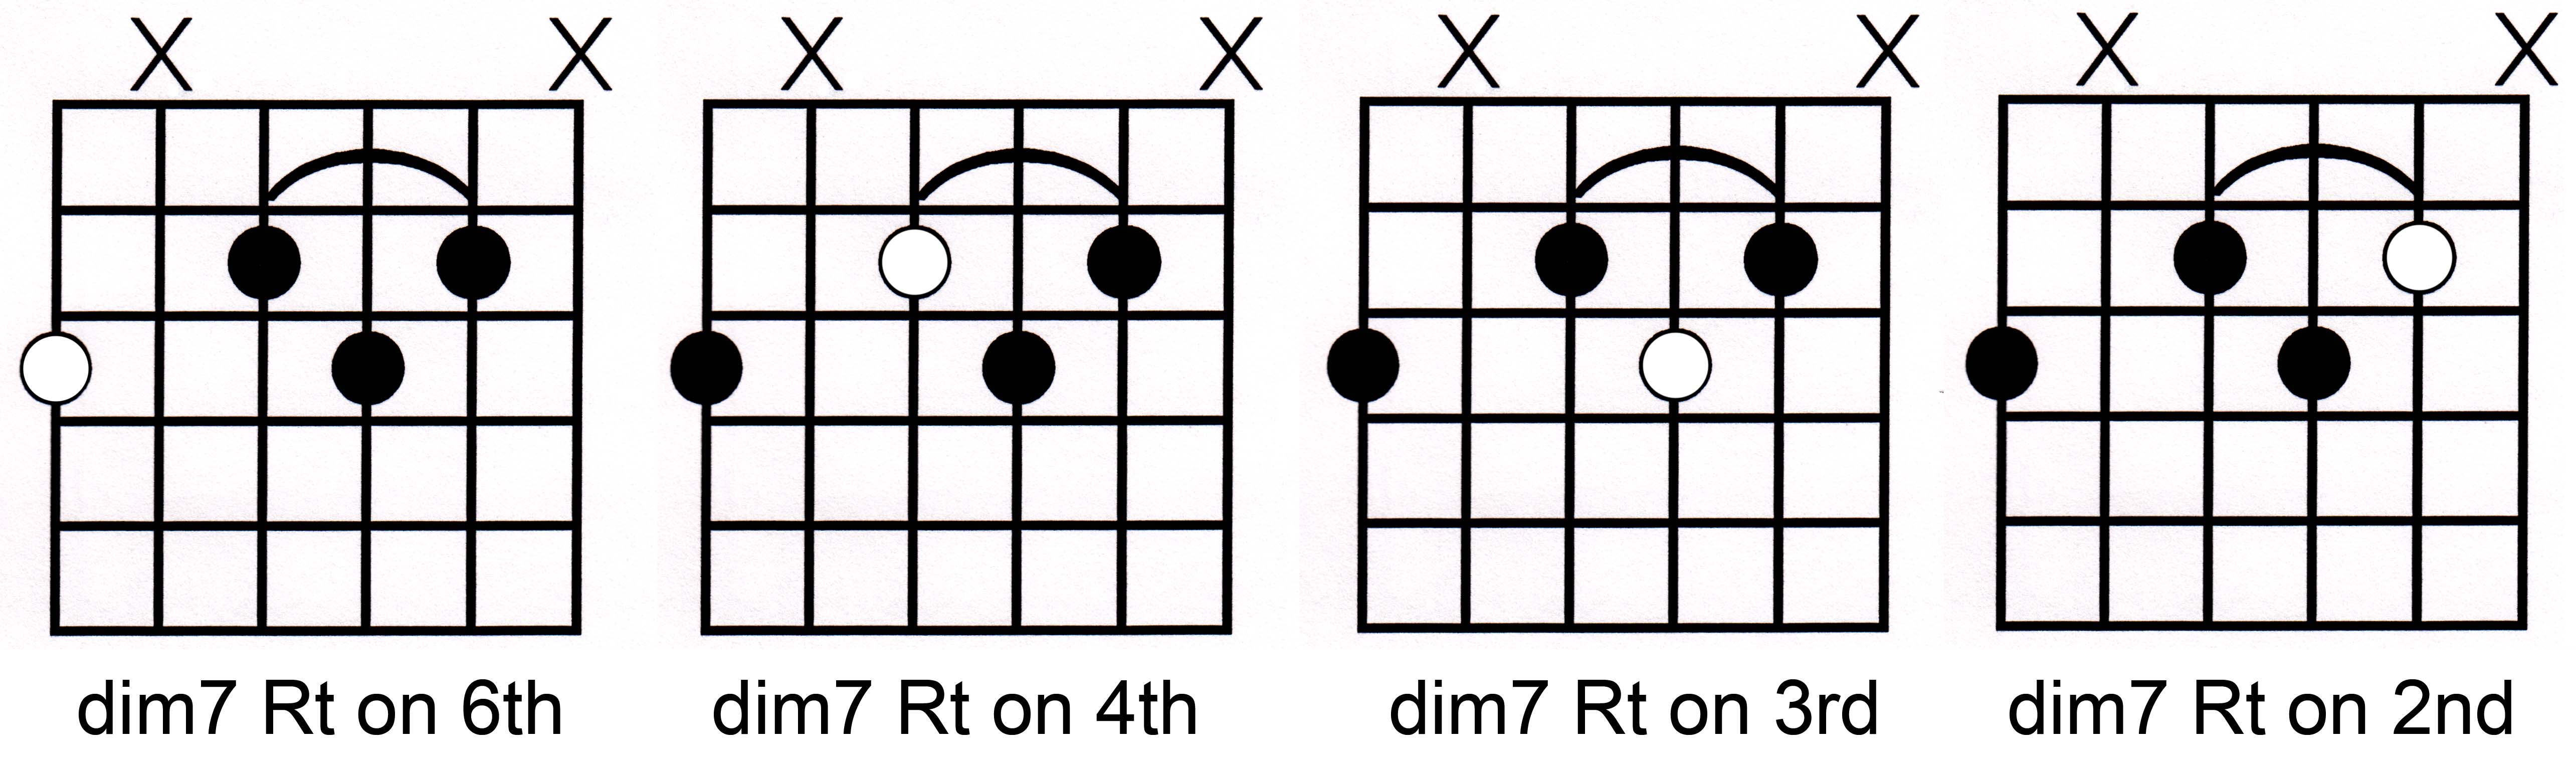
The first we'll show you is a "secret" that's really pretty cool, and easy. Below is a chord form (how it's played). What is it? Do you recognize it?
Would you believe me if I told you it is eight different chords in one fingering? Don't believe me? Okay, let's break it down. Here are the first four, which are
diminished 7 chords:
Here are two more, which are 7b9 chords:
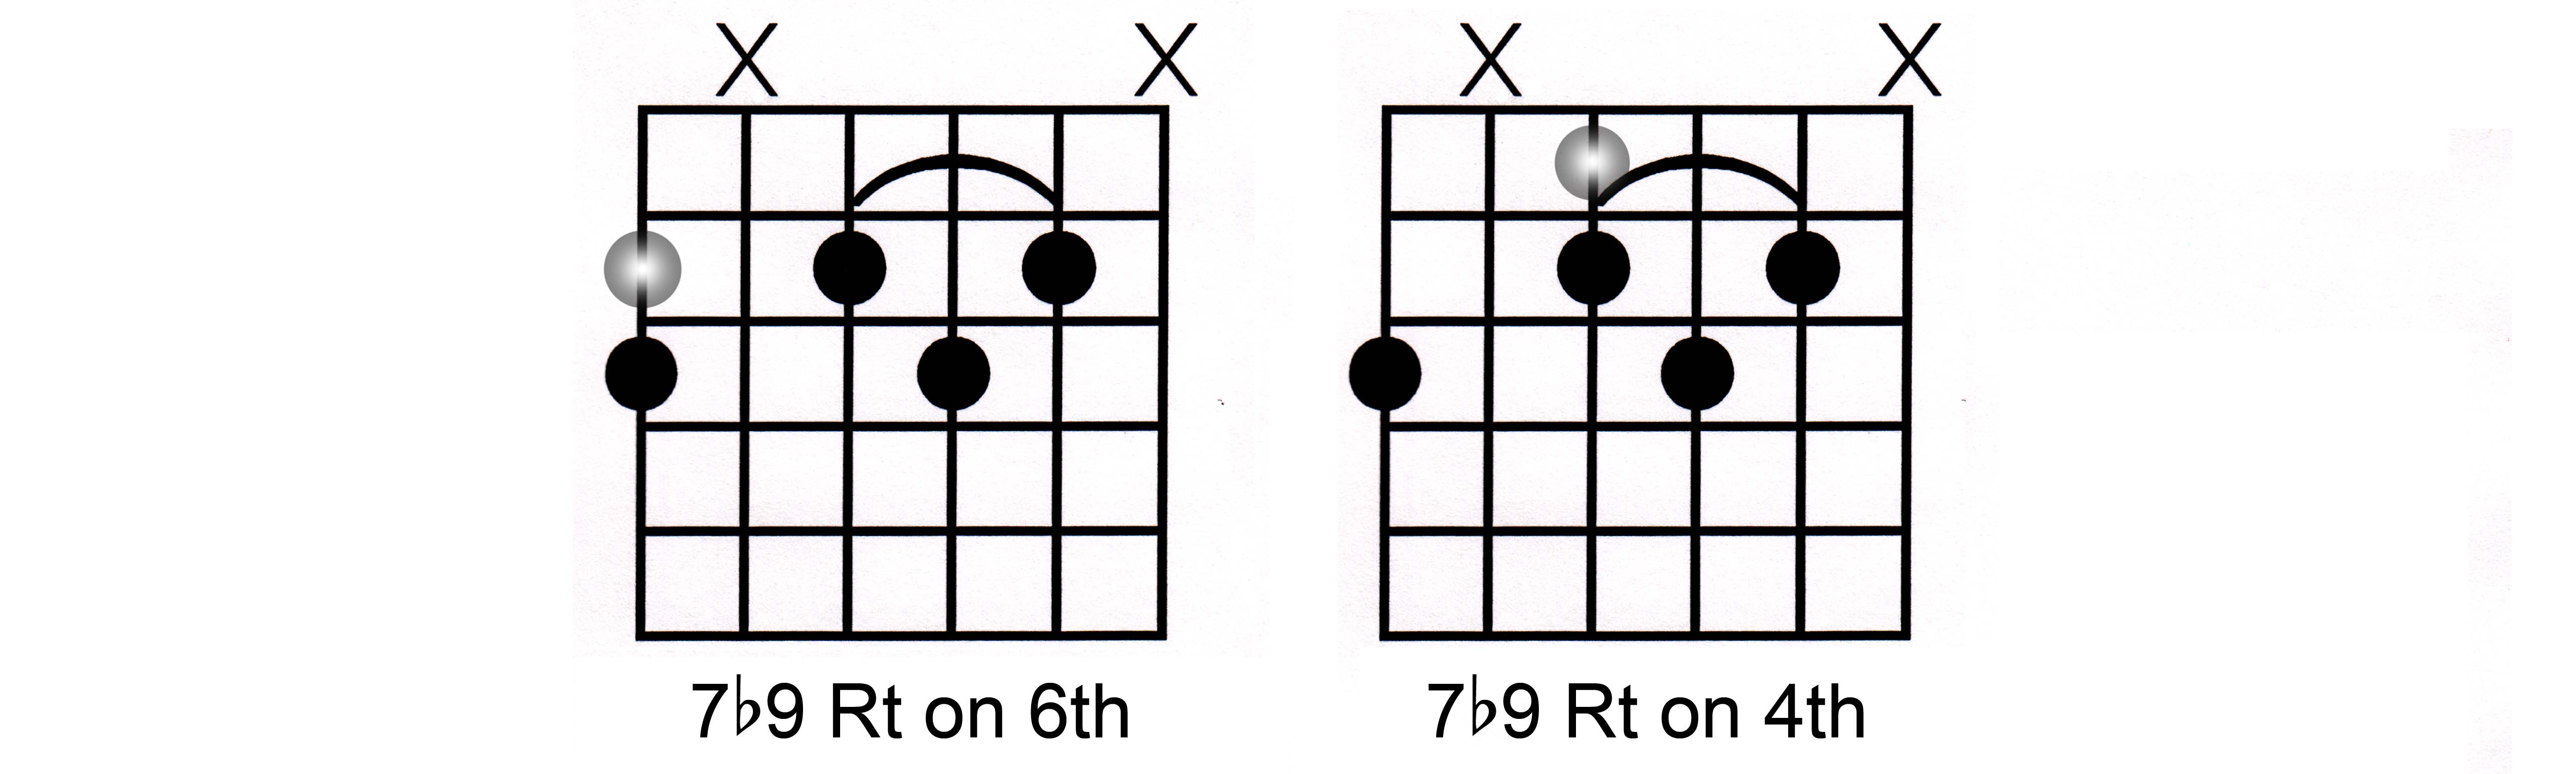
The grey dots represent the root of the chord. So, these are "rootless" chords. Now, can you find two more 7b9 chords in this fingering? Try it out.
Here's why it's important. Remember a few lessons back we talked about moving a chord form "over", transferring it from one string to another, and it becomes another chord? Well, here we are simply changing the location of the root, not the fingering or position of the chord form. What happens when you do this is that the relationship of the notes to the root changes when you move the root tone around.
What other chords can you find that allow you to move the root around and change the chord into something else. There are a few and when you find them, learn every permutation that shape can be!
Now for a "trick". Many musicians struggle with with playing a "3 over 2" figure. What we're talking about here is playing three notes evenly across two beats and arriving at the third beat in time. This technique is tricky at best, and will sound awful at worst. So we're going to show you how to count it properly, and never miss the mark again, period.
Look at the graphic below. This is how it will appear in the chart:

Now let's break it down.
What you do is simply convert each of the three quarter notes into eighth notes. Now you have six of them over two beats.

Turn those six notes into two sets of triplets...

...and remove the 2nd, 4th and 6th notes, counting in the traditional "3 over 1" triplet feel from the Blues...

...hold the 1st, 3rd and 5th notes over...

...and there you have it: how to play "3 over 2" and always nail it correctly every time.
We're all "students". There's always more to learn! Now shut off your computer and go play with some ideas.
See you next time.