How To Practice Chord Patterns, Part One
While we have touched on chord construction, we haven't really focused on just how you should practice your chord playing in the form of exercises. Why this is important should be clear from the previous lesson in this column. If you do not fully understand chords, where any given chord lies on the fret board, and the different ways to play them, you are going to struggle to create the voicings and sounds you want, whether in learning something off records or in translating what you are hearing in your imagination.
In this first part, we'll cover some basic concepts for practicing, to give you a sense of how playing through chord patterns can and should be approached.
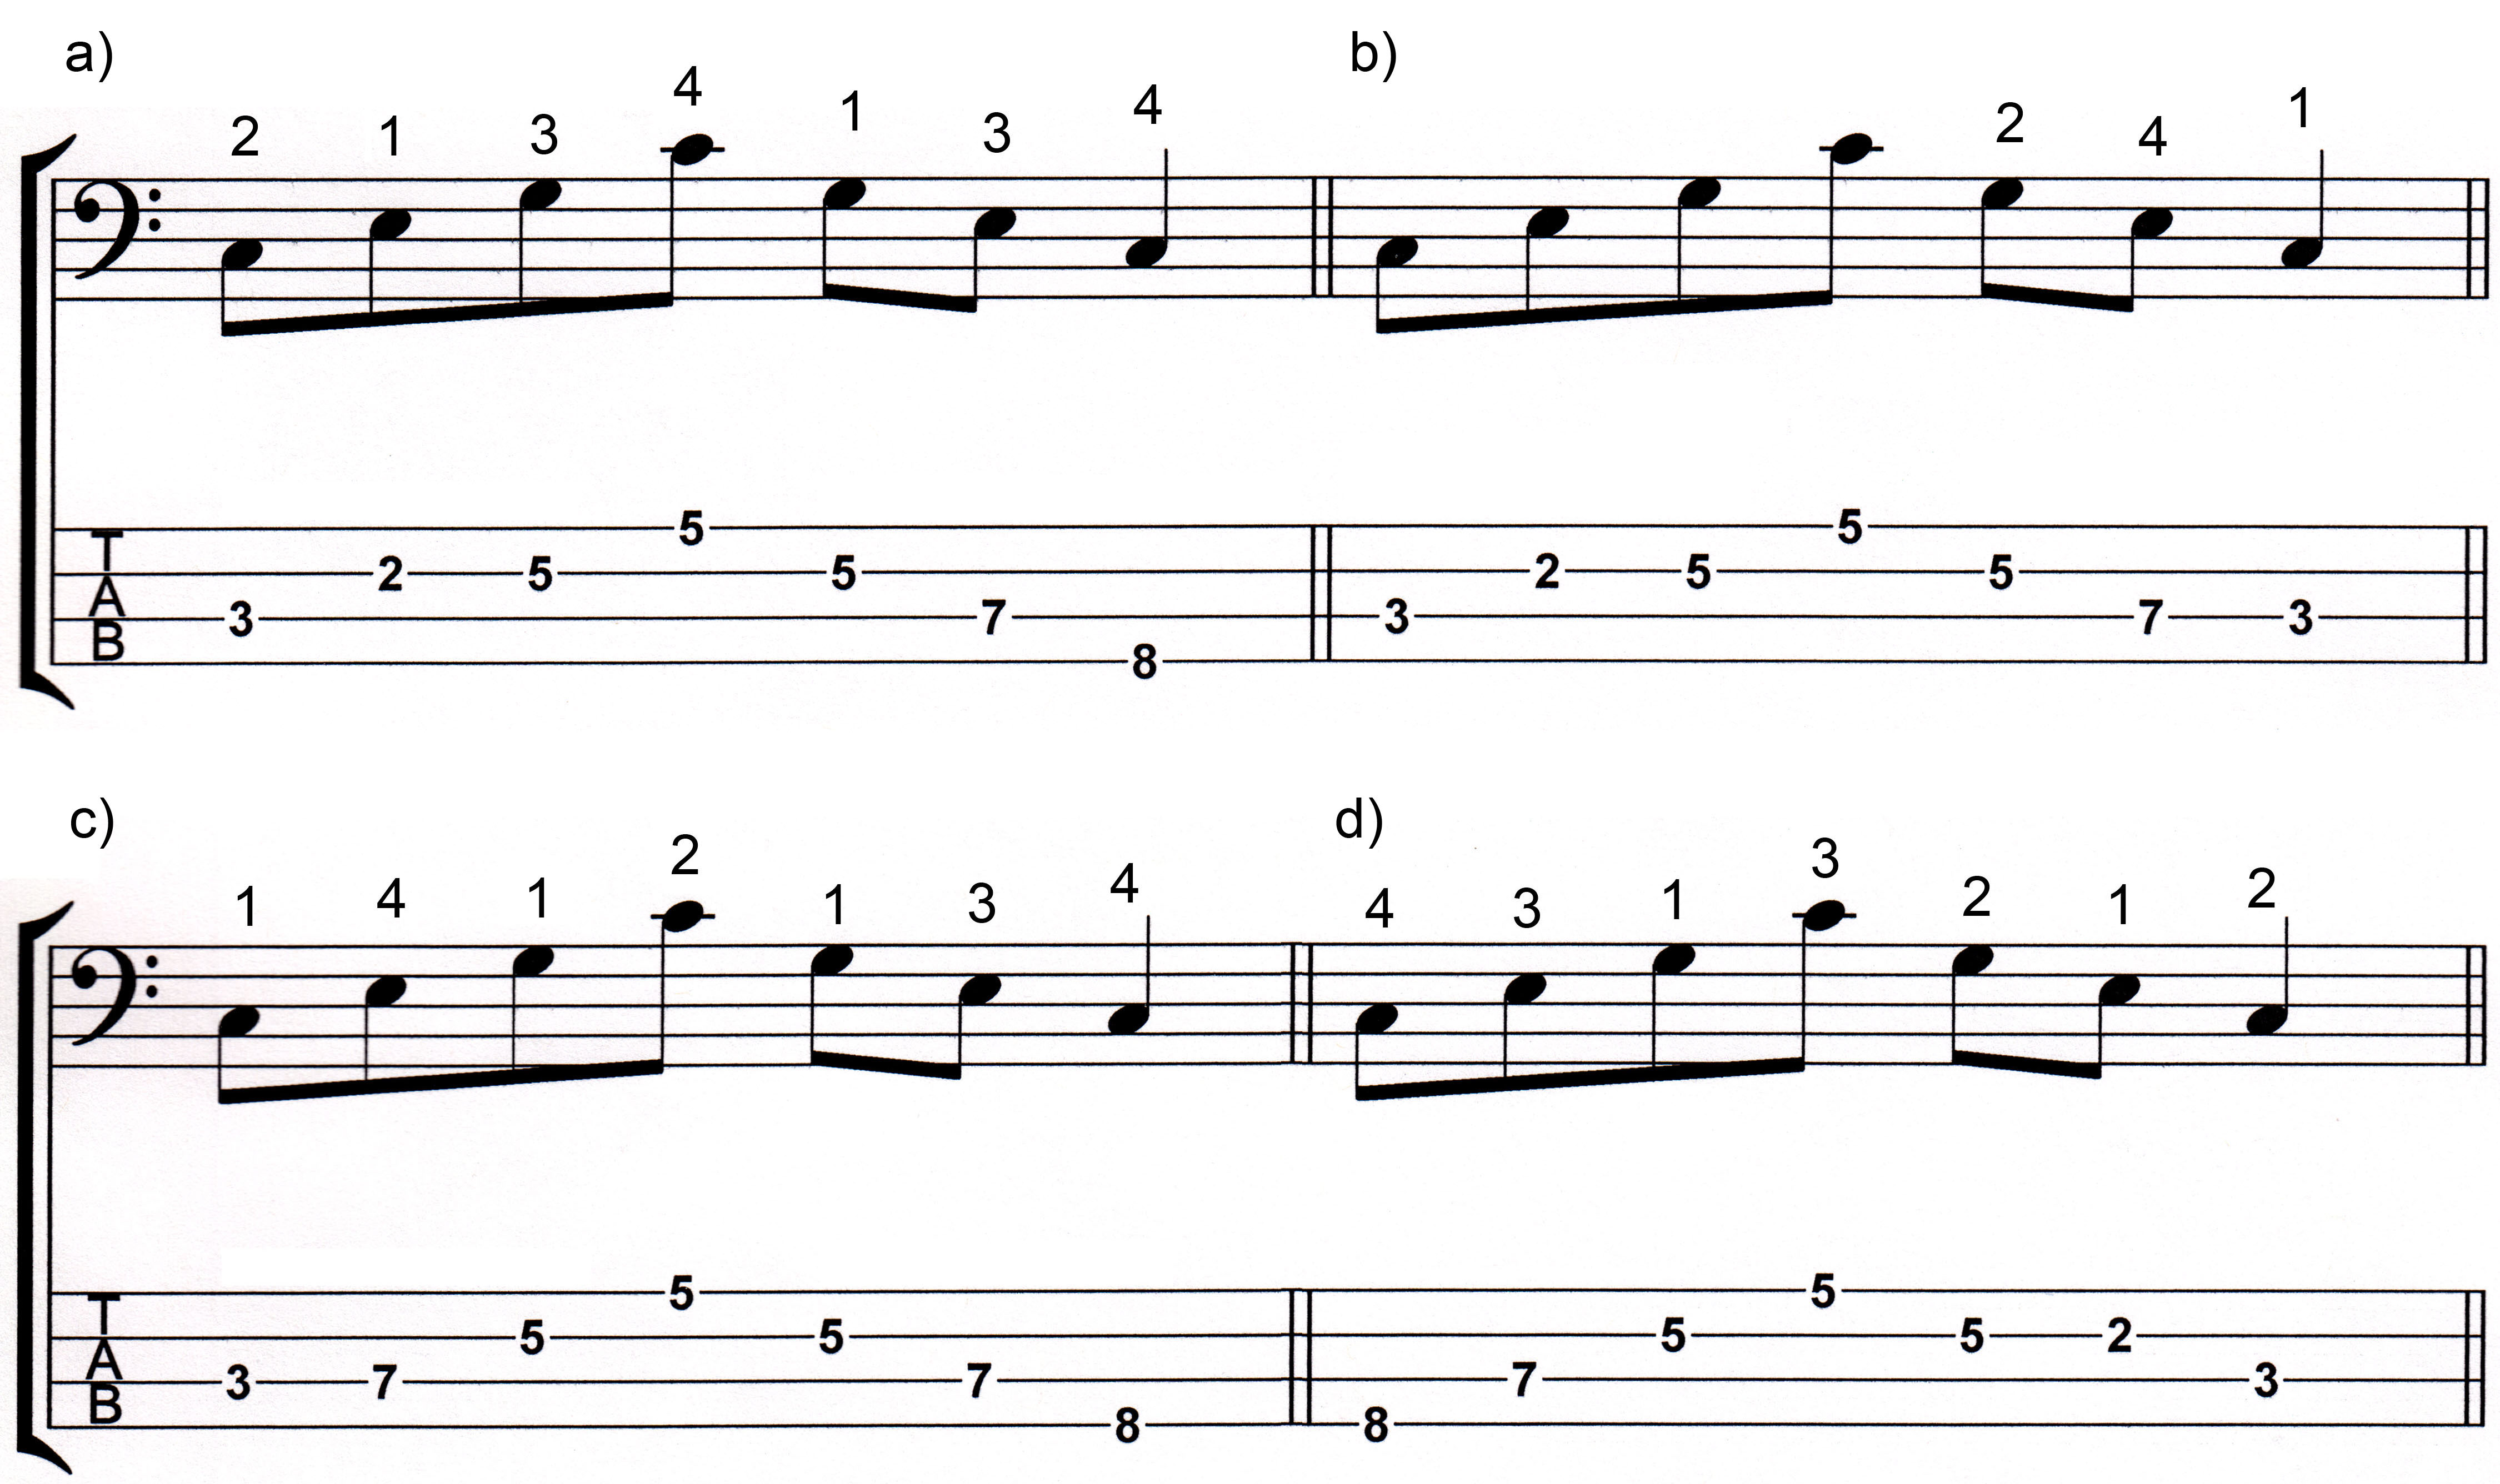
Let's begin with the Major chord. As you learned in a previous column, the Major chord is composed of the 1, 3 and 5 tones of the Major scale. So in the key of C, you will be looking at the following notes: C, E, G. We are rooted on the 3rd string for this exercise - but also on the 4th string, too (and, if you want to get technical, yes, on the 1st string as well).
In the graphic below are four ways to practice playing this one chord. Pay close attention to the fingering suggestions. I am an advocate of using all your fingers rather than laying a finger down to cover two strings, which slows you down on faster passages (wasted energy and impeded motion). I am a dexterity advocate: where you can play with your fingers (versus laying a finger across two strings), you should play with your fingers. You will get better tone and fretting control.
Okay, play through this slowly, learning the patterns and fingerings.
Once you understand what you are doing, add the metronome at around 72 bpm to begin and get it fluid and smooth. Add only 2-4 bpm at a time. You must preserves technique as you advance to higher tempos. Never leave your technique behind for the sake of speed. Only speed up as you are comfortably able to play at each tempo setting in a fluid fashion.
The object is to play each individual pattern in all 12 keys. This helps you to more fully understand your fret board, where all your root tones are for any given chord, and so informs your potentials and all the notes everywhere they exist.
Why this is important is because of one simple fact:
Chords are everywhere all over the neck
So, within a five fret spread, you can literally play any chord in any key. The root may not be the bottom note (which means it is an inverson), but every chord in every key is there. Don't believe me? Once you get a good handle on what you're learning here, test it out.
Alright, the second chord is also a Major chord, but rooted on the 4th string (and, yes, the 2nd string as well) in the key of G (G/1, B/3, D/5). This series of patterns is a bit more
limited, but equally important. Play through each pattern in all 12 keys.
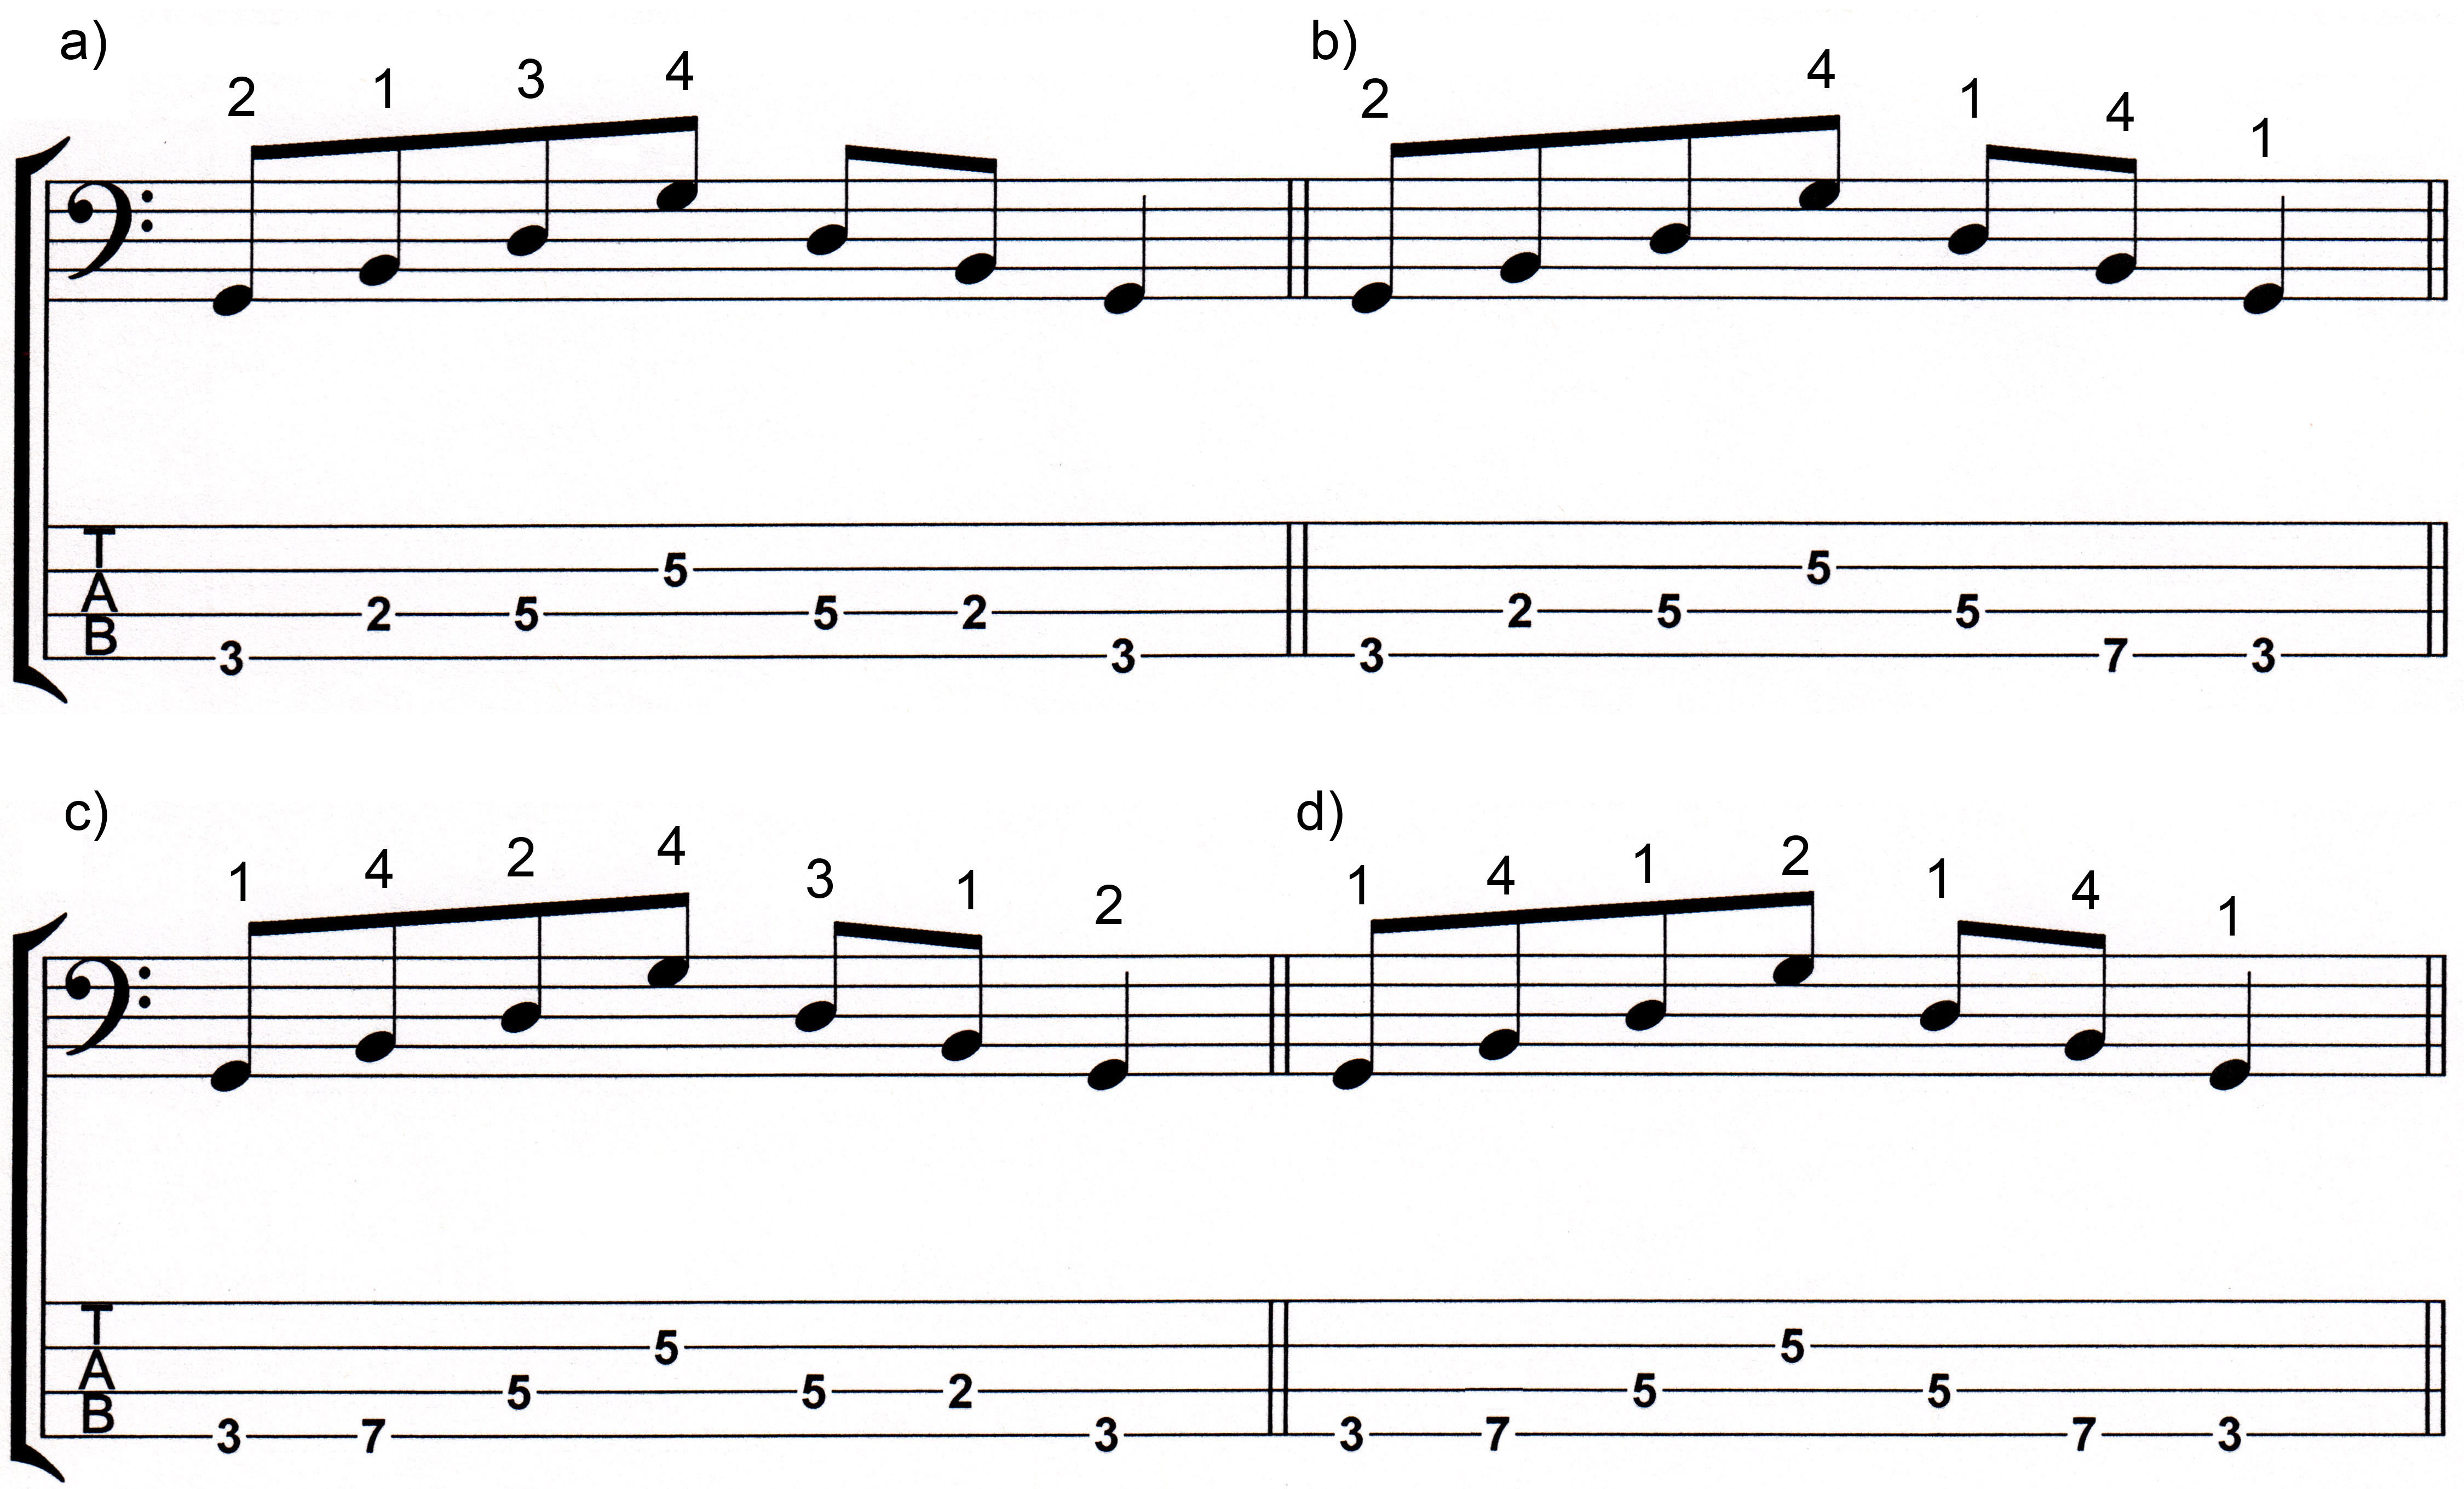
Convert the 3 tone to a b3 and repeat the whole process for the straight minor chord form.
Now let's turn to the vertical approach, playing up the neck. This technique is important for when you want to change positions, transitioning to a lower or higher register on the neck.
Staying with the same Major chord form, here with two examples in G, beginning on the 4th string:

Yes, they are nearly identical, but they are different in how they ascend up the fret board. It is important to have more than one way to play things because it will help make composing or learning a pre-existing part easier if you have alternatives and options. Not all hands are the same size; some things are easier than others, and hand size, finger length dictates the approach, based on physical attributes or limitations.
Here is another example, in C, rooted on the 3rd string:
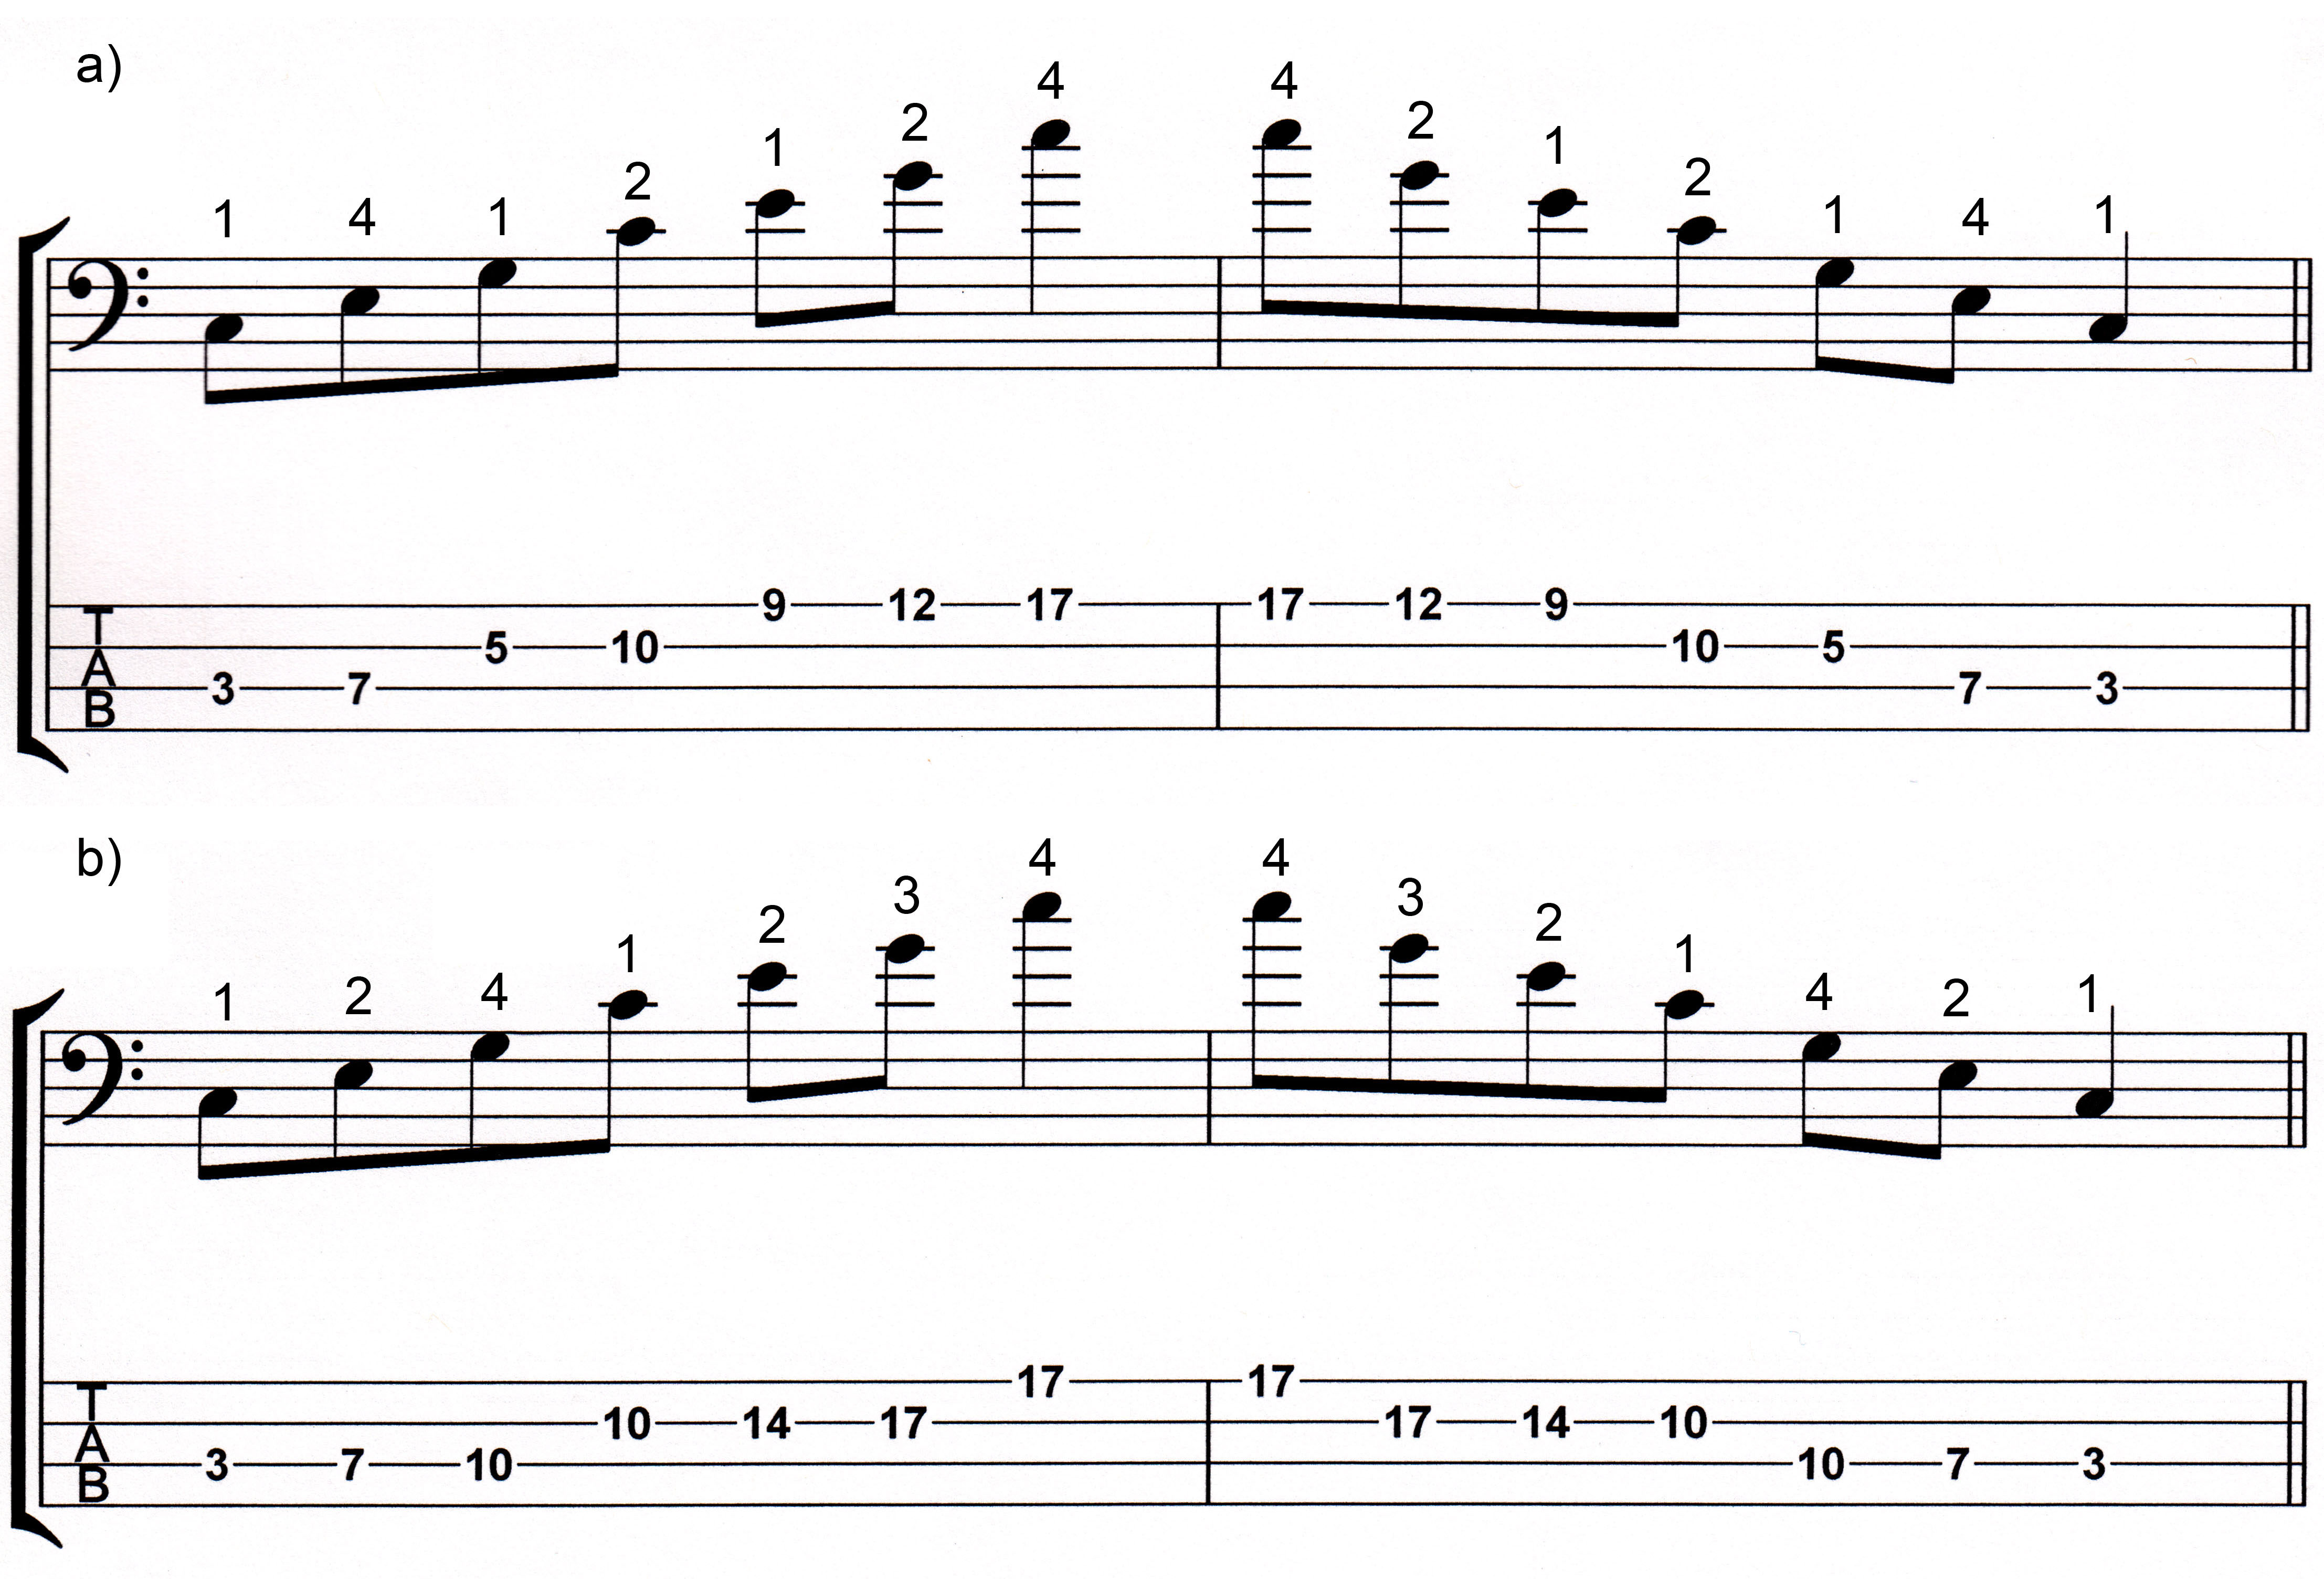
You could just as easily start on the 3rd fret of the third string, and end descending on the 8th fret of the fourth string, too. It just depends on what you're doing and where you'll be playing the next bits; that's what determines how you play any given part: Where are you and what are you going to play next?
Now, everything you are being shown here are just that: examples. You may use these to create your own approach to the playing of chord voicings - that's the point. This is a springboard to stimulate ideas in your thinking, to give you different perspectives on how things can be done, how parts can be played.
You may also find the fingerings a bit cumbersome, especially if you have bigger hands, or longer fingers. Adjust as you need - but justify the changes. Don't do things in an arbitrary or careless fashion. That approach can have disastrous consequences down the road. Everything should be deliberate and intentional - purposeful and logical.
That will do it for this installment. Study this stuff well, learn it in all twelve keys, both Major and minor, and in Part Two we'll cover some more involved chord shapes.
Next time!