Okay, you're saying, I know this. And that's a good thing, but you might want to read through this lesson anyway because it involves a method of playing it that you
might not yet use, but which will greatly benefit you in the long run. If you don't know this scale, then this lesson is going to be very important for you to
understand - you must know this scale if you have any hope of really grasping the foundation of scales, chords, progressions and all that stuff you're working
on to become a better guitar player.
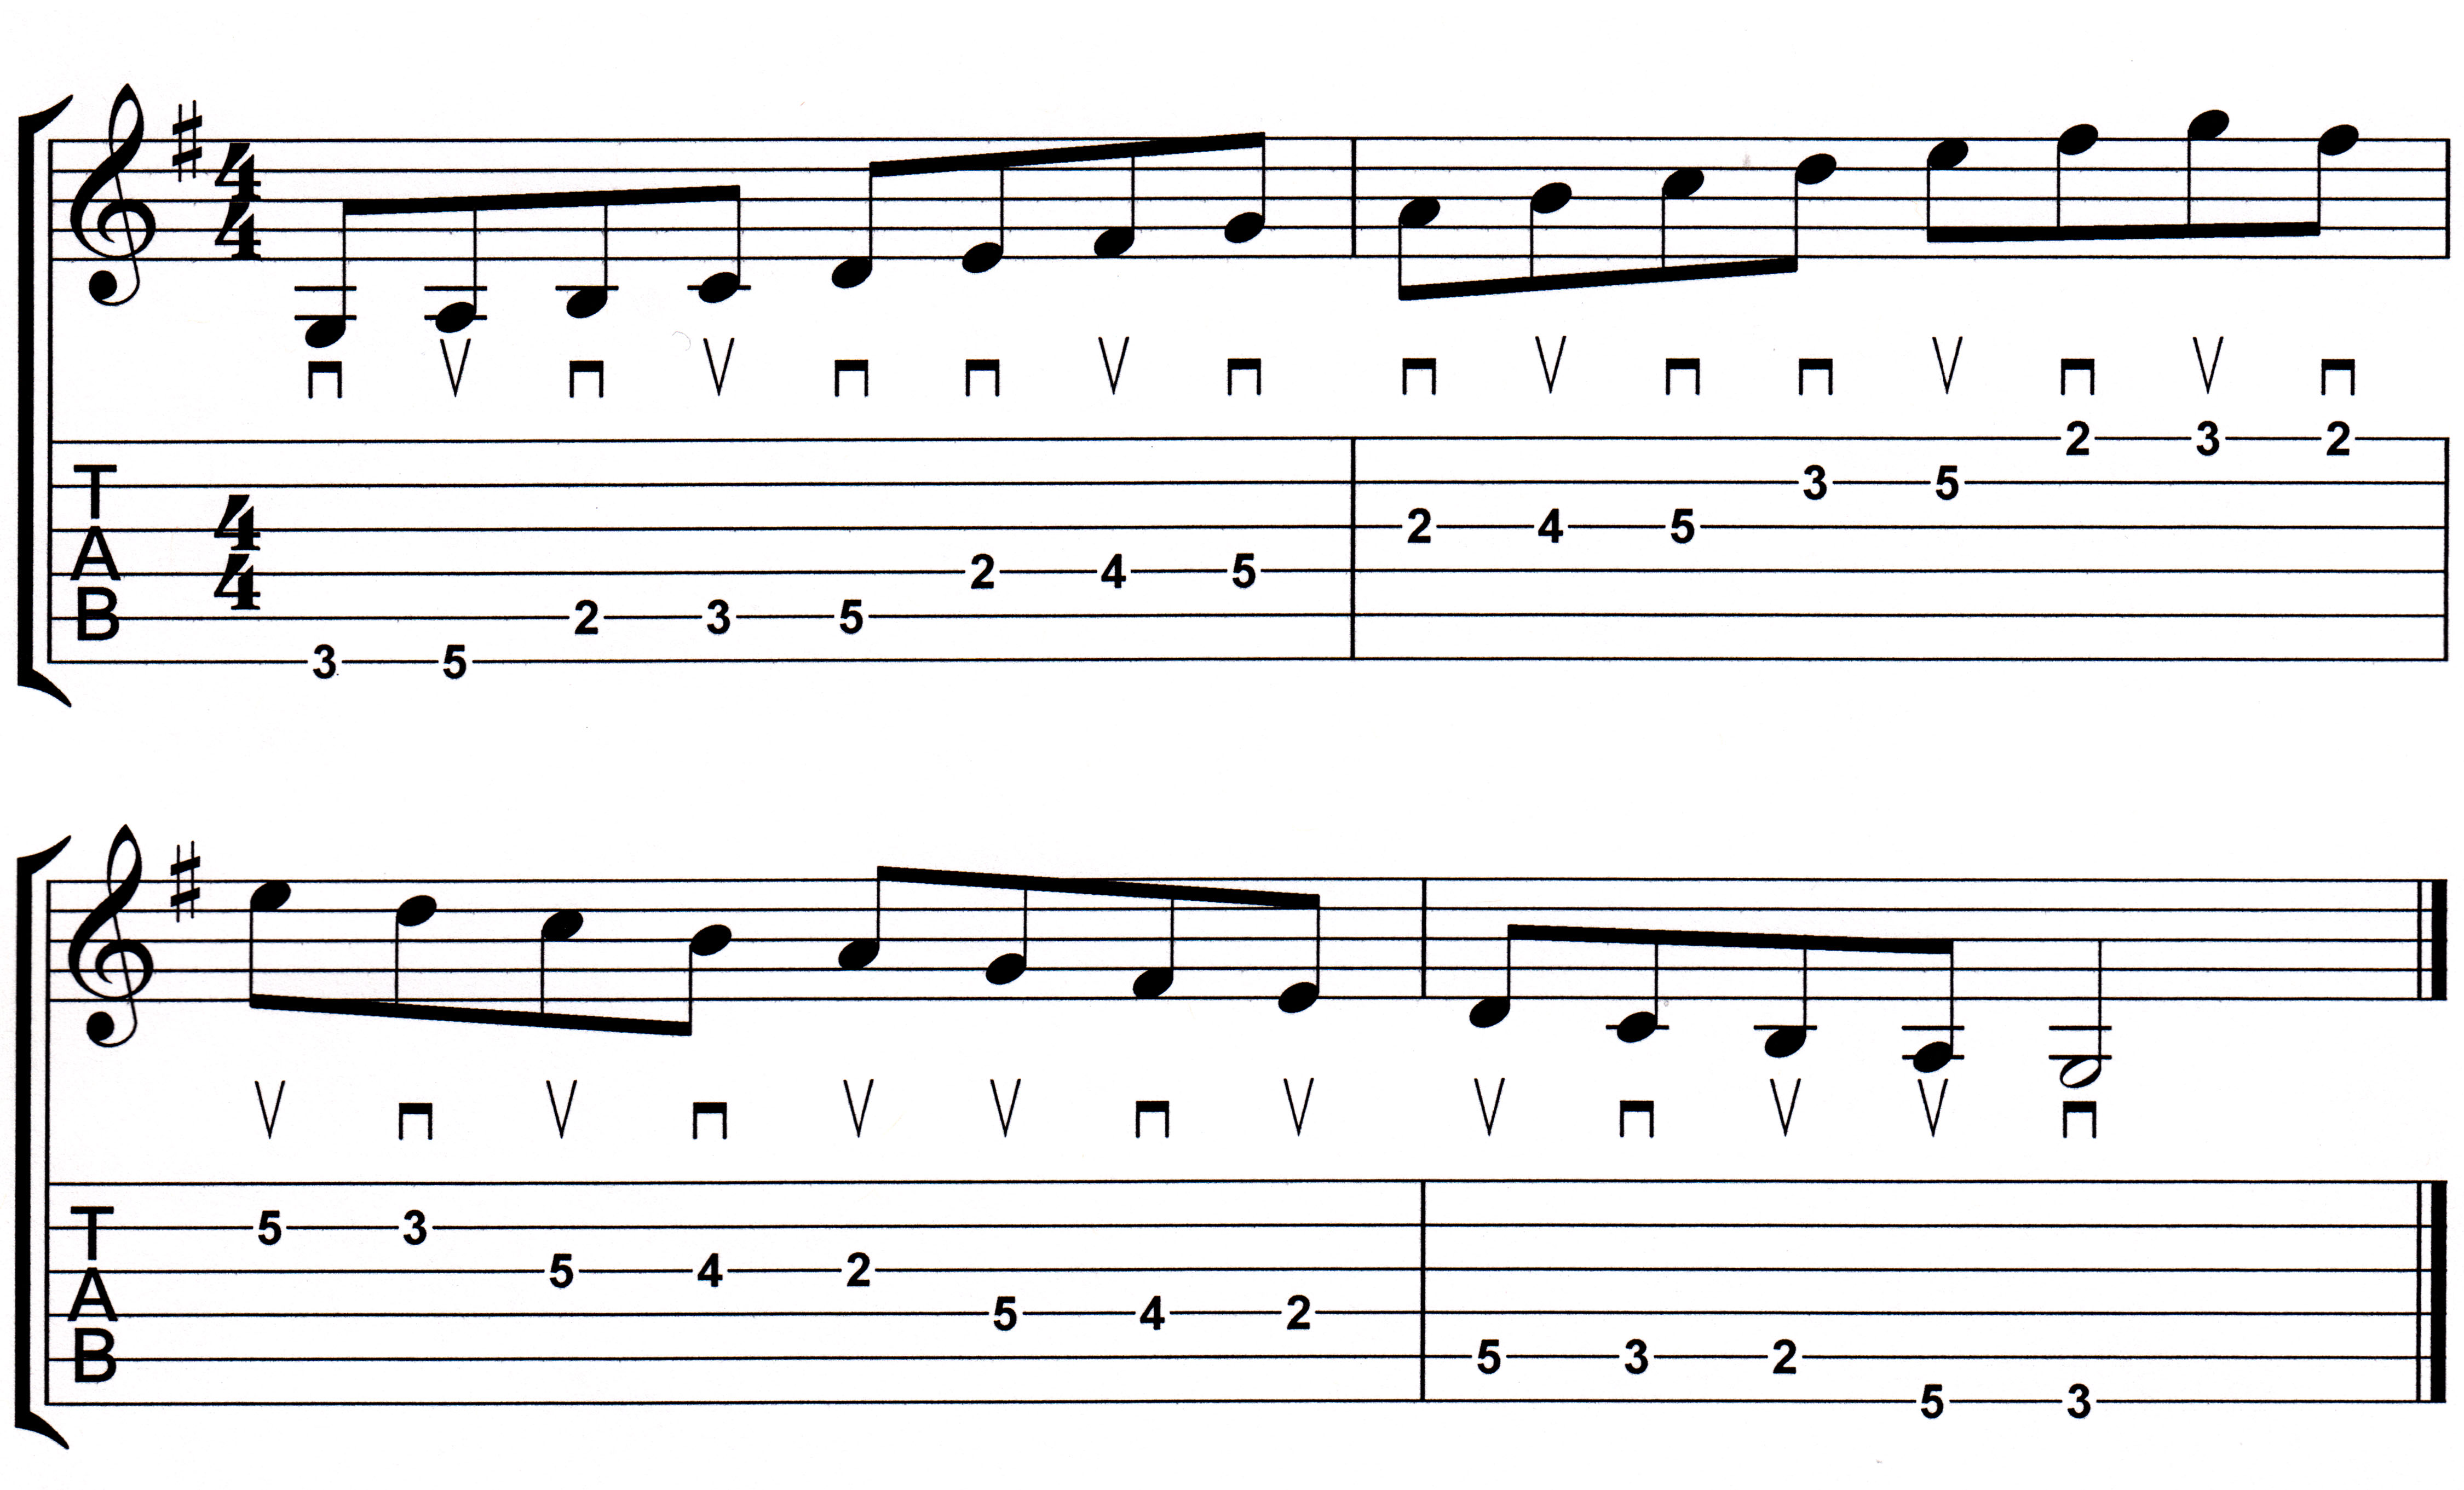
So here it is in the key of G. And you'll note also the picking instructions; it outlines a method referred to as "economy picking", a means of using the least
amount of motion to most effectively play a passage. If you look at the picking pattern outlined below, you will get the idea of what it's about if you
choose to try it out. Play through this slowly at first; then read on to learn a really beneficial technique on how to play the scale, all scales, well.
Now, of course you want to play this properly, so there is an approach that works very well to do this, and which can be applied in many other instances. The first aspect is referred to as the "one finger - one fret" approach - positional approach.
As you play through the Major scale, you would start with your second finger on the 3rd fret. Every note that occurs on the 3rd fret is played by that finger. So here is the order of things:
This creates consistency of approach and makes things easier to execute.
But, it doesn't just end there. You also want to employ a second device as used by Classical stringed instrument players, like violinists and cellists.
When ascending up the scale, you want to keep your fingers on the strings. Do not lift them off. For example: After you play the first note of the scale, your 2nd finger should remain on the note with pressure even as your fourth finger begins to play the 2nd note of the scale at the fifth fret.
As the second note is played, your 2nd finger can release pressure - but remain in contact with or just hovering over the sixth string.
Just as you move to play the 3rd tone of the scale on the fifth string with your 1st finger, your 4th and 2nd fingers release the sixth string and hover - do not lift them more than a few millimeters off the strings.
Then, as your 2nd finger plays the fourth note of the scale, the 1st finger remains on the string with pressure.
As your 4th finger then plays the fifth note of the scale, the 2nd finger should remain on the string with pressure; your first finger can relax now and begin to move over to the 4th string for the next note, the sixth of the scale.
You continue this technique all the way through the ascending phase in playing the scale. This is not difficult, but if you’ve been playing without this discipline it will take a little focused effort to change your method and keep your fingers hovering over the strings.
Just remember to work on smooth and even note flow, letting each note have its full measure of sound and time.
As you descend back down the scale, obviously you have to lift a finger off the string to sound the next lower note on the same string, but - just a couple millimeters, no more. They have to be ready for the next note they'll be playing, regardless of which direction your ultimately are headed. Descending licks tend to be easier to play for some reason, but that's no excuse to not focus on smooth and even sounding notes!
You will want to use a metronome to help you play nice and even. Set it at a speed slower than you think you need, especially if you've never played this scale before. And even if you have, but are new to the idea of leaving fingers on the strings, slow it down and get it right. Only speed up a few beats per minute at a time until you master each speed. Then add more beats per minute, but only around 4 to 6 at a time. You want to bring technique and clarity forward in your progress; it would be a shame to leave technique in the dust in favour of speed and slop.
The reason you want to learn this technique is so that your fingers will always be ready to perform whatever task they are asked to play, and there will be minimal movement required to do that - at least in that position. The same idea can be applied to chords, too, in the sense that you want your fingers hovering just off the strings as you move from one chord to another.
The primary benefit beyond good technique is that your speed will begin to increase, your fluid motion will improve, both in legato phrasing and chord changes you employ.
This lesson deals with a very specific technique that takes a little effort to adopt as part of your playing style. Watch the more accomplished guitar players you admire; you will see they employ this technique; their fingers hover just off the strings no matter what they are doing. Learn from them!
Okay, now shut off your computer and go play with some ideas.
See you next time.